Table of Contents
Introduction to Home Recording
With the advancement in music technology and easy access to high-quality gear at low prices, more and more artists are looking beyond traditional music studios and are trying to record studio quality vocals at home.
The myth that chart-topping hits are exclusively created in professional music studios is fading.
Look at Billie Eilish’s 2019 sensation, ‘When We All Fall Asleep, Where Do We Go?’ This album was completely recorded in a bedroom studio. It dominated the Billboard 200 chart and earned six Grammys. This success is a shining example for anyone questioning whether pro quality vocals can be recorded with a home recording setup!
Home recording has never been more accessible. Advancements in technology empower anyone with a voice to produce studio-quality sound. Let’s dive into this process and decode how you too can record pro-quality vocals in the comfort of your own home!
Essential Equipment for Recording Vocals at Home
To record vocals at home one must first gather the right tools. You will need some basic audio equipment which will turn your home into a real home studio. Here’s a breakdown:
1. Microphone
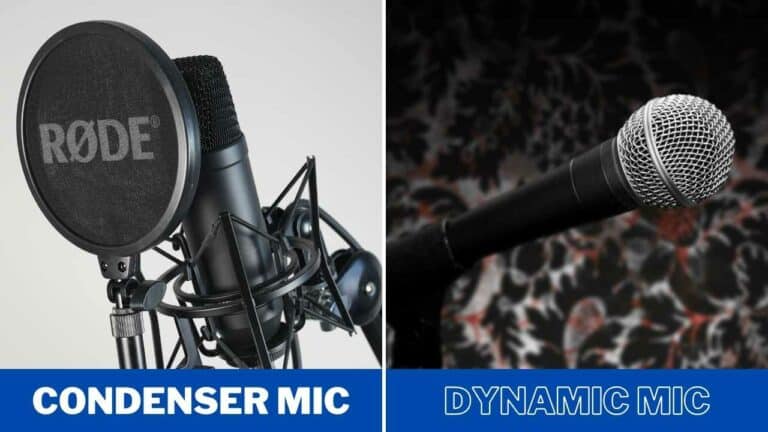
You can record vocals on your phone too but if you want the best possible quality getting a good microphone is the best option! And honestly you can get a great sounding budget mic pretty easily now days.
Microphones are primarily of three types:
- Dynamic Microphones: Dynamic mics are less sensitive and are best while being used for extremely loud sources of sound, like drums, or during live performances.
- Condenser Microphones: Condenser microphones on the other hand are very sensitive and work well in a studio or home setup, i.e. in a controlled environment.
- Ribbon Microphone: Ribbon Mics are typically less sensitive than Condenser mics. Their overall tone is also warmer and more neutral as compared to the colouration which a Dynamic or Condenser mic may give to your vocals.
A good large diaphragm condenser mic will be a great microphone choice for singing and recording vocals at home.
Music Radar suggests Audio Technica’s AT2020 as a great budget choice with exceptional sound.
BUT, if you are doing metal vocals with a lot of screaming and growling then a dynamic mic would be your best choice.
2. Microphone Stand
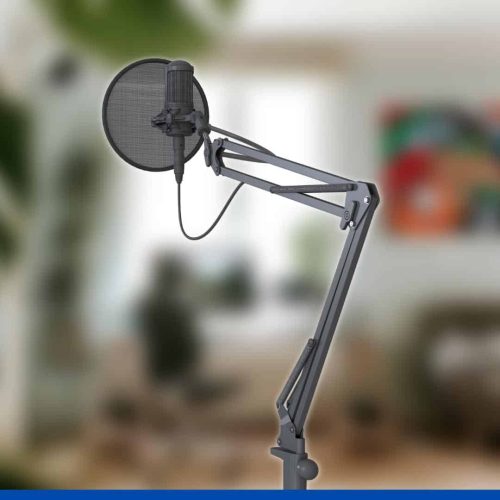
A bunch of entry level Condenser Microphones now have a bundle option and can be purchased with a stand. But, in case yours doesn’t, it’s a good idea to have a strong mic stand set up. This will make sure the mic doesn’t move while recording and which in turn will make sure that you have the best sounding vocals recorded.
3. Vocal Booth
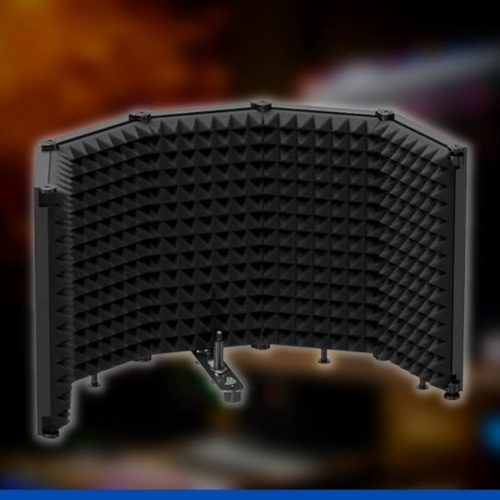
The room you are recording in at home will most likely have no acoustic treatment which will make your voice reflect off the walls, creating unwanted echoes and a hollow sound in the recordings.
A simple vocal booth is a great way to isolate the sound of your singing better so that there are less reflections and room sound. You can get a good one made out of high-density foam from Amazon.
This will also make it much easier to mix your vocals later on.
4. Pop Filter
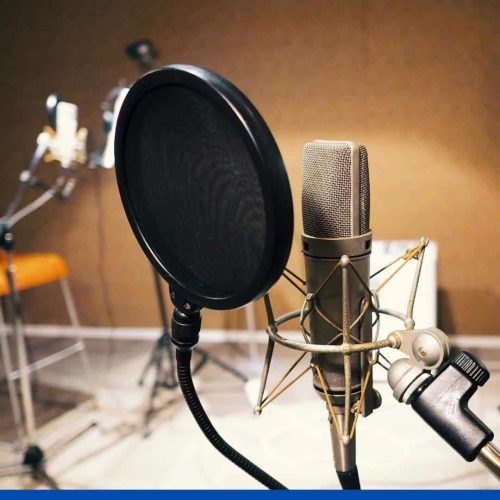
Pop filters, also called pop shields or pop screens, help block unwanted ‘b’, ‘p’, and ‘t’ sounds, preventing distortion in recordings.
It blocks the direct flow of fast-moving air into the mic which, if unchecked, can cause popping and crackling sounds.
5. Headphones
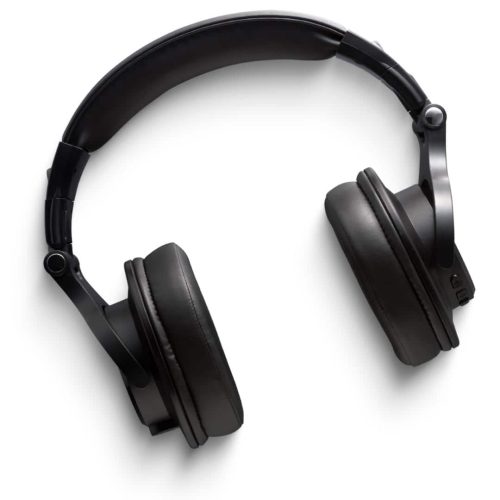
A good set of headphones are an absolute must for recording vocals. While singing you need to be able to listen to the backing instrumental track while recording as well as during playback. If you play the backing track on your speakers (or studio monitors) while recording, the sound will also go into the mic which would essentially destroy your vocal recording!
You need headphones to be able to listen to the backing track (plus your vocals) and not have a bunch of unwanted noise go into the microphone.
Closed-back headphones are preferred during home vocal recording to prevent sound leakage especially when recording in close proximity.
6. Audio Interface
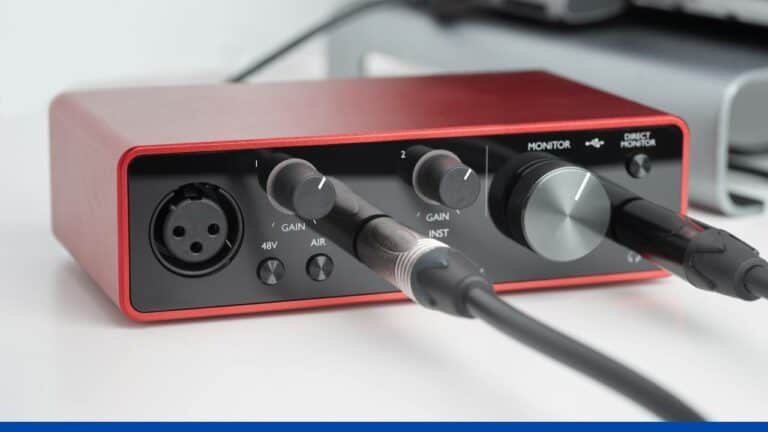
An audio interface acts as a bridge between your microphone and your computer. It converts the audio signal from the mic to a signal which the computer recognizes. The interface also gives back output from your DAW to your speakers and headphones.
A simple interface like the Focusrite Scarlett Solo can work great for a home studio.
BUT! There are also a lot of USB Condenser microphones available now which can be great options! The quality you can get from these will be almost at par and you would not need a separate audio interface to connect into.
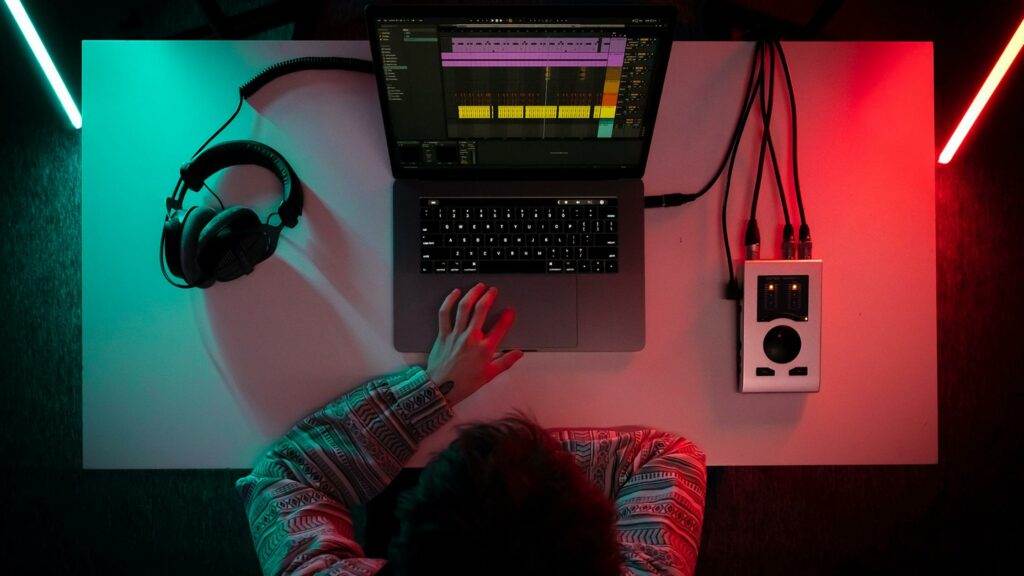
7. Workstation - PC or Mac
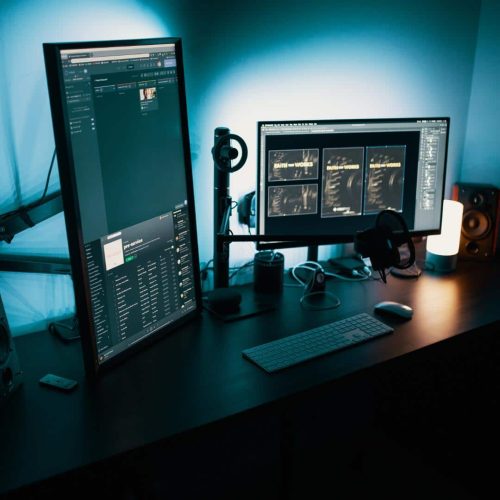
This is a more obvious one, but you would of course need a computer!
Oh, and it absolutely doesn’t matter if you use a PC or a Mac! Really…it doesn’t!
For the purposes of recording only vocals any regular system would do just fine. The only time you might need to upgrade is if you plan on doing heavy mixing sessions with a ton of plugins or if you are using huge virtual instrument libraries.
8. Digital Audio Workstation (DAW) - Your Audio Recording Software
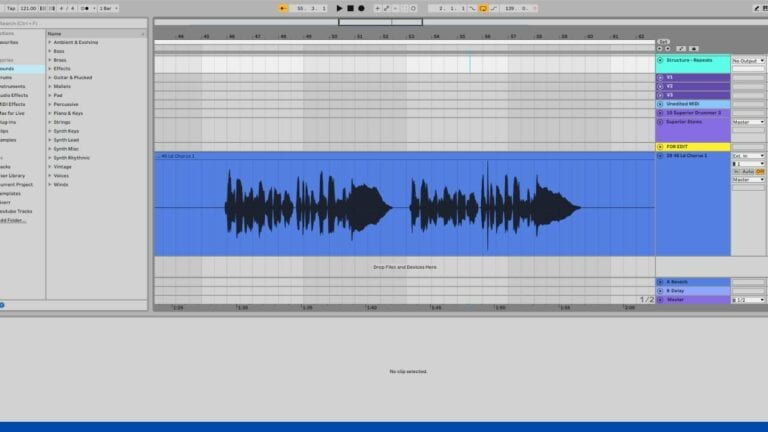
DAW is the software into which you can record your audio. It comes with essential tools like equalizers, compressors, limiters, reverbs etc to help you shape your audio.
And oh man, there are so many of these and each with its own pros and cons.
If this is the first time you are ever recording and want a free solution, you can check out something like Audacity!
If you are looking for something cheap but with the capabilities of the best DAWs out there, then Reaper is the one for you. Reaper costs $60 for a personal license but can go toe to toe with the best DAWs out there. It is both feature rich as well as customizable. BUT, you can also expect a slightly longer learning curve on this software.
Other industry standard DAWs include ones like Ableton, Cubase, Pro Tools, Logic, FL Studio and Studio one. Each of them is brilliant and you would face no problems recording vocals using these.
Setting Up Your Home Recording Studio
1. Choosing the Best Room

This is a very important step in making sure your vocals sound good. Your ideal room would have the least amount of echoes. Avoid any rooms which have too many hard surfaces, for example your bathroom. Having furniture, carpets and curtains can also reduce the echoes in your room significantly.
Also choose the room which has the least amount of noise. So if a room is facing the road in front of your house with a lot of traffic, then absolutely avoid that!
2. Microphone Position in the Room
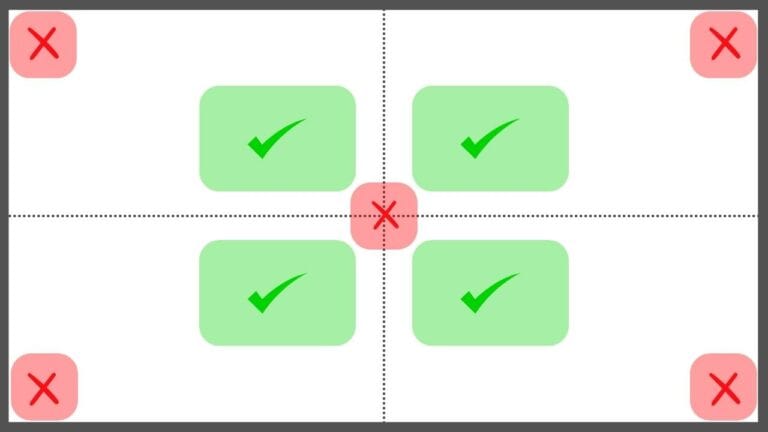
The first tip for positioning the mic – avoid the corners! Corners have a lot of buildup in the bass frequencies which is horrible for your recording.
This would make it seem that the centre of the room would be best. BUT, it’s not! The centre too would get a lot of reflections.
The best place would be to have your mic positioned facing the longer side of the room, slightly off centre both in length and width. If you would like to know more about positioning the mic you can check out this video by Audio Haze on Youtube.
3. Treating The Room
Some basic treatment of the room can really help with the acoustics in your room and improve the quality of your vocal recording.
Treating the room for recording vocals doesn’t just mean adding acoustic panels. It also means just adding…stuff! Having things like carpets, sofas, beds, or thick curtains in your room can make a big difference by itself.
If you want a more professional setup, you can of course use acoustic panels, but remember, the idea is to reduce reflections in the room, not to have deaden the room! An overdose of room treatment can lead to very dull sounding vocals with little energy in the 7k and above frequency region.
Techniques and Tips for Recording High-Quality Vocals
1. Position the Mic Close to the Singer
Using the right mic technique can save you from headaches later on.
If you are using a condenser microphone, then the placement should be anywhere from 6-12 inches from the singer’s mouth. If you keep it closer the mic will pick up a lot of noise from the singer’s breath and your vocal recording might be filled with clicks and pops everywhere.
If you keep it further away than 12 inches you will catch less of the direct vocal sound and also start catching other room sounds.
2. Adjust the Mic Input Level - Avoid Clipping!
A good level to record is at -12db to -18db which leaves enough headroom for further processing. Adjust your mic input level until you see it being recorded in the DAW at this level. If you record at a higher volume, you risk clipping and distorting your signal.
Post recording you would eq, compress and saturate your signal and bring it back up in level but in a more pleasing and controlled way.
3. Do Proper Vocal Warmups
If you want the best vocal takes, then do not forget to do your vocal warmups. Warming up helps your vocal muscles get ready.
You will be able to sing for longer and also have a much easier time hitting higher notes.
4. Keep The Mic At Lip-Level
For most people the microphone height can be at lip-level for the best sound. In case that is causing too much popping and crackling then you can place it a few inches higher and point it downwards.
5. When Recording, Don’t Go For The Hard Stuff Right Away!
Choosing something easier to start with has 2 main benefits. Firstly, you will be able to warm up your voice further without putting too much strain on the vocal chords.
Secondly, by nailing the easier part you will definitely get more confident which will help in turn help you when singing the more difficult parts.
6. Record in a Consistent Environment
To have the best mix possible you should aim to have the overall vocal performance as consistent as possible. If you have placed a mic in one place for recording the verse, then DO NOT move it around during the chorus.
And even worse, do not change the room you are recording in midway! It would give your recording a different texture and it will be difficult to match the tones for the different vocal recordings.
7. Make Sure Your Headphones Are Set to the Right Level
If you can’t hear everything properly you will not get a good vocal take. Simple as that.
Make sure you can hear the backing track plus your own voice clearly. The backing track can’t be so loud that it drowns your voice or so low that you can’t keep time because you can’t hear the track.
Headphones can also create feedback when near the Mic, so reducing the level slightly can help remove that feedback.
8. Record Multiple Takes and Select the Best One
Having options is better than not having them.
As a rule you should do minimum of 2 to 3 takes for each part. This will give you the ability to choose the best one later on.
You can also cut and use different phrases from different takes to combine and make the best possible take.
Some professional singers go extremely overboard with this and do 20, 30, 40 or 50 takes and literally select the best of each word from each take.
9. Do not overprocess the Vocals
When editing and processing your vocals take care to not go overboard. Editing a vocal take to death will actually take out all the energy and realness and make it dull and lifeless.
If you overprocess you might lose intelligibility as well as emotion.
10. Be prepared
The best way to get amazing vocal takes is to be prepared well! Make sure you know the lyrics and have a hang of the overall rhythm of the track.
Having this nailed down beforehand will save you a lot of stress. While recording you can focus on the recording aspect more instead of prepping.
In case you do not remember the lyrics make sure you have them handy in a notebook, on a phone or however you else prefer.
Basic Vocal Processing Techniques
Once you have recorded your vocals you will need to process the track in a way which makes it sound good. This process of making all the individual stems sound good together is known as mixing.
If you are unfamiliar with these techniques, you can also purchase and use presets (like these ones from Rysupaudio) as a starting point for your vocal processing and build your own sound from there.
Some of the basic vocal processing techniques are explained below!
1. Equalization (EQ)
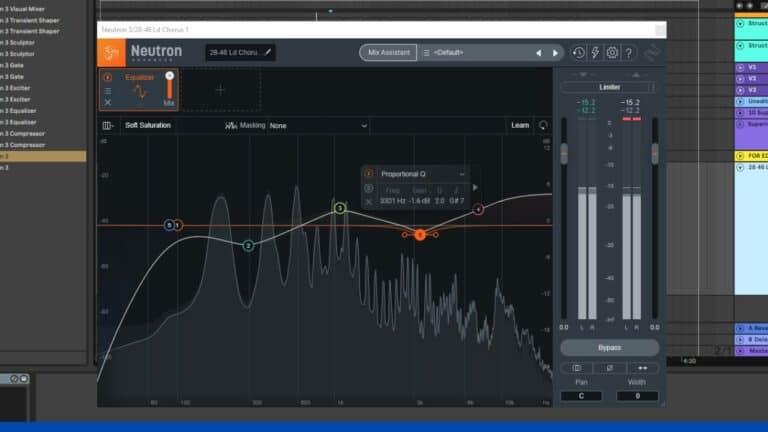
EQ allows us to change the volumes of individual frequencies in an audio source. It helps us reduce the “bad” sounding part of the recording and enhance the good.
For instance if a vocal was recorded in a relative dark sounding room, you might want to boost all frequencies above 5k to give the vocals some life. EQ can also help us remove all the unwanted resonances from your room.
Listen to the two vocal recordings below. The first one is a raw vocal take while the second has been EQ’d to remove some of the mud and add higher frequencies.
Raw
EQd
2. Compression
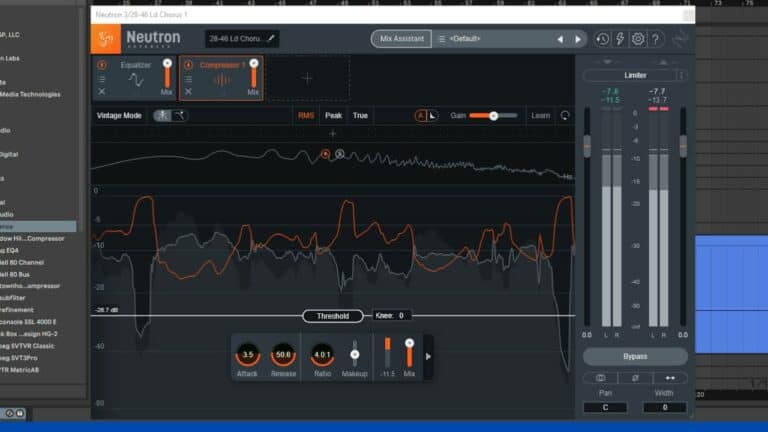
Compression simply helps reduce dynamics in an audio recording. Once you compress your vocal signal it will help bring down the level of all the phrases which have loud volume and give a more consistent vocal sound where each word can be heard properly.
The modern vocal sound typically has a ton of vocal compression which helps make it more upfront and consistent. A raw vocal recording could easily have more than 20db of gain reduction in a compressor to get it closer to a modern sound.
Listen to the 2 audio recordings below and see if you can point out how the overall dynamic range of the vocal recording has changed. In the first track you can hear the volume for certain phrases go up and down significantly. This has been evened out in the second track where you can hear all the words at a relatively consistent volume (lower dynamic range)
EQd
EQd, Compressed
3. De-essing
De-essing is a way to control the sibilance in your vocals. Sibilance refers to the “s” sounds when you sing which get particularly out of hand after heavy compression. Almost all DAW’s come with some sort of a de-esser.
But be careful not to overdo it or the vocalist might start sounding as if he has a lisp.
Listen to the 2 audio recordings below and see if you can make out how the vocals in the second audio track have less “T”, “P” and “S” sounds.
EQd, Compressed
EQd, Compressed, De-essed
4. Saturation
Saturation is a pleasing way of adding distortion to a vocal signal. It adds compression and harmonic distortion and can typically add warmth to a signal.
Normally, a moderate amount can be used throughout the vocal recording and sometimes excessive amounts are used as an effect in select places.
Listen to the audio below and try to hear the saturation in the second vocal track. This has been exaggerated to help you hear it better but my preference would be to dial back the saturation in an actual mix.
EQd, Compressed, De-essed
EQd, Compressed, De-essed, Heavily Saturated
5. Reverb
Reverb adds a sense of space to your vocal recording. Commonly used reverb for a vocal recording could be a hall, chamber or plate reverb.
But be careful when adding reverb! Add too much, and the whole sound could end up being too washy and will lose clarity.
Listen to the vocal tracks below to hear how reverb added a sense of space and made the vocals sound larger than life.
EQd, Compressed, De-essed, Saturated
EQd, Compressed, De-essed, Less Saturated, Reverb
6. Delay
Delay, also known as echo, adds depth to your vocals and can help it fit much better in the mix. It adds a rhythmic echo which can be timed with the tempo of the song. It can help fill out blank space as well as add a sense of space.
You can hear in the audio recording below how delay also adds a sense of space but the effect feels and sounds different as compared to a reverb. In a mix you would dial in a mix of both reverb and delay based on your taste to get the vocals to sit right with the other instruments.
EQd, Compressed, De-essed, Saturated
EQd, Compressed, De-essed, Less Saturated, Delay
7. Limiting
Limiting is an extreme form of compression. It helps to lock the audio signal below a particular threshold. This can work great at the end of your chain to make sure there are no absurd peaks.
8. Tuning
There are a ton of vocal tuning plugins available now which can help you get the vocals absolutely perfect, if that’s what you prefer. Though, leaving a little bit of inconsistencies can make your vocals sound real and full of feeling as compared to a perfectly tuned vocal performance.
Final Thoughts
Preparing your environment and your equipment to record at home can be slightly tricky in the beginning but it can be extremely rewarding! You can get exceptional vocal recordings at home, when you want, with complete flexibility and without having to rent high priced studios.
So, if you are serious about recording, take the time to understand what you will need, and just jump in. The most important part is to experiment and find what works best for you!
Frequently Asked Questions
What equipment do I need to record vocals at home?
You would need a computer, a USB microphone and headphones in the very least to record vocals at home. If you are not using a USB microphone then you would also need an audio interface.
Above this, you can invest in a pop filter and a vocal booth as well.
What type of microphone is best for recording vocals?
If you are recording vocals at home then getting a large diaphragm condenser mic is your best choice.
How can I reduce noise when recording vocals?
Use a pop filter to reduce pops and crackles and use a recording booth to reduce reflections. If there is additional sound coming from outside the room then you can start by making sure the windows, doors and any other openings are sealed.
What type of audio interface do I need to record vocals?
A simple interface like the Focusrite Scarlett Solo or similar will work great for recording vocals at home and it can connect easily to your computer with a USB cable.
What type of pop filter should I use for recording vocals?
Nylon pop filters are typically the most common and will work great for a home studio.
What type of headphones should I use for recording vocals?
Closed back headphones which will not leak any audio outside will work well.
What is the best app to record myself singing?
A good free app to use on either PC or Mac is Audacity. If you are looking for a more feature rich DAW then you can also check Reaper.
How can I record my voice at home without a mic?
You can record vocals using your phone’s microphone. But keep in mind it will not give you the same audio quality as a condenser mic.
What are backing vocals? Should I record them?
Backing vocals are parts which help spice up the main vocal performance. These could be sung by different singers in a live performance or the same singer in a studio setup. Backup parts would include things like harmonies, doubling specific phrases to add emphasis or adding completely separate melodies on top of the main vocal melody.
Backing vocals add texture and can really spice up a vocal performance and you should absolutely do it!
What is double tracking?
Double tracking is exactly that, tracking the vocals twice. The second lead track is kept at a lower volume than the main one and used to thicken up the vocal sound. When recording you would have to try and make the double tracked vocal as close as possible.
What is the Proximity Effect?
When you sing too close to the mic it can alter the way your voice sounds by emphasizing the bass and low-mids, this is called the proximity effect.
What is a Cardioid Polar Pattern Microphone?
A polar pattern is the way a microphone picks up the audio signal. A Cardioid Polar pattern is one of the best for capturing vocals. It captures all of the sound in front of it and rejects the 180 degrees behind it.
Should I Switch off My Air Conditioner While Recording
Air conditioners typically are pretty loud and can create a lot of noise in a vocal take while recording with a condenser mic, which has a high sensitivity. It is good to switch off the AC plus any other heavy appliances which could create any noise while recording.
